If you want to cook the best rice possible, you should learn how to use a rice cooker.
Here’s some good news – learning how to cook rice will be the easiest thing you have ever done.
This simple kitchen appliance takes next to no time to set up, yet the quality of the cooked rice you can then achieve is outstanding.
This appliance has you covered whether you use brown rice, basmati rice, wild rice, or white rice.
It has grown much more popular in recent years, as they eliminate the hassle of cooking rice on a stove and worrying about how it will all turn out.
Understanding the basics of a rice cooker could be the perfect solution if you have trouble making rice. Here are some instructions to help you out.
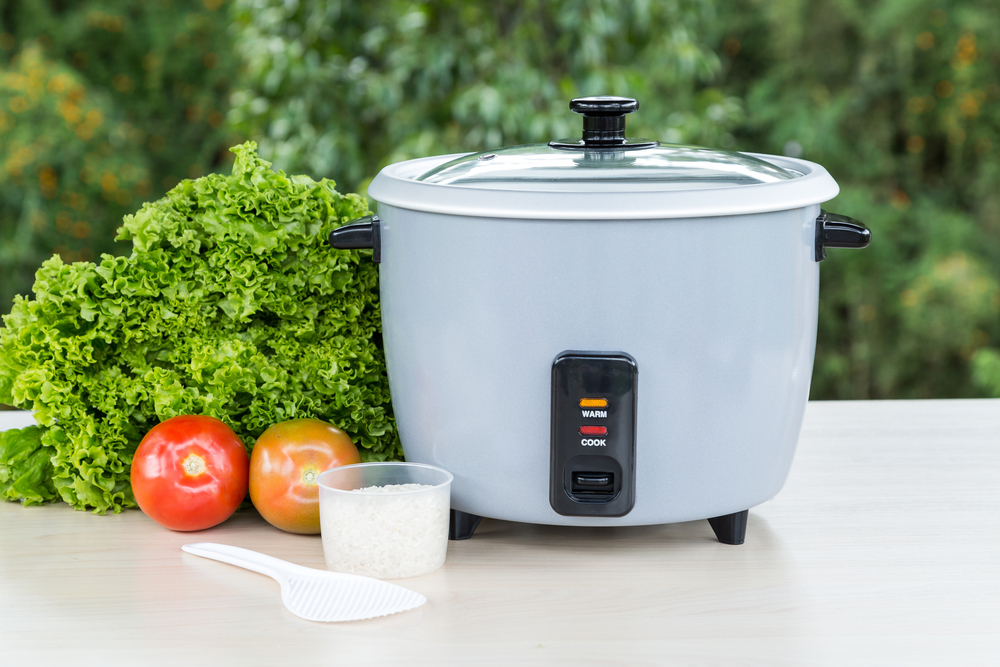
The Basic Idea of a Rice Cooker
While you could use the rice cooker for other foods, it is best used for cooking rice. With a rice cooker, the idea is that you can cook rice without worrying about keeping an eye on things and whether or not your rice is undercooked or too sticky. As long as you follow the instructions, you can cook it to perfection every single time.
A rice cooker works by monitoring the temperature and cooking time. The rice cooker is quite an intelligent machine, but you need to make sure that you set it up according to the rice you are cooking.
The cooking time for brown rice is significantly different from white rice or sushi rice. The machine can only do so much on your behalf, and identifying the rice is not part of the deal. That part is up to you.
You have so many rice cooker options open to you, so you need to take some time reading the manual for your particular version before you get started.
According to settings, there will be a few differences, but the actual basic idea of how you prepare the rice and what you need to add to the rice cooker will stay the same, no matter the model.
Using Your Rice Cooker
When using a rice cooker, you must know the key steps. By learning these steps, you will be able to cook rice every time consistently.
Step 1: Measuring Your Rice
The first step is to measure your rice accurately. Most rice cookers even come with a measuring cup, so don’t just eyeball things. You need to know how much rice you are cooking, as this determines the water ratio that you will include.
As a rule, you should measure out a cup of rice, or however many cups you need, and then start preparing the rice.
Step 2: Preparing the Rice
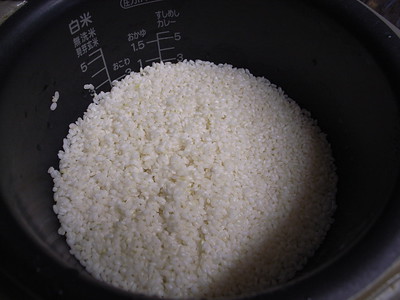
Before you even use the rice cooker, you need to prepare the rice. To do this, you need to rinse the rice grains, and you should do this well. The idea here is you will wash off the excess starch, as that will have a negative effect on your rice.
This means the rice grains should sit there individually rather than clumping together. It also means there’s less chance of the rice boiling over. Starch is not a good thing for your rice because it makes the rice too soft and gelatinous. Make it a habit to remove it before cooking.
Step 3: Adding to Your Rice Cooker
Once you are happy with how you have rinsed your rice, you need to add it to the rice cooker pot. You don’t need to stir the rice or do anything to it. Pour it in and leave it as it lies.
Step 4: Adding Water
Now onto the important part – you must add water. Rice cookers work in the same way as cooking rice on the stove, but they can keep an eye on the temperature better than we can.
Your water-to-rice ratio should be 2 cups to one cup of rice. That is pretty standard, whether you are looking at short-grain rice or long-grain white rice. However, watch out for brown rice, as that takes longer to cook, so you need more water.
Step 5: Add the Lid
The next step is to add the lid. This is essential, or the water will cook off too quickly, and you are then left with rice that will end up burning as the water evaporates.
Most rice cookers will have either a viewing section to allow you to keep track of what is going on or a glass lid. This feature will allow you to keep track of your rice without opening the lid. Constantly opening the lid to your rice will disrupt the overall rice cooking steps and could potentially ruin your rice.
Step 6: Switch It On
It would help if you switched your rice cooker on, where things can be different.
There are different types of rice cookers out there on the market. If you have a basic version, then you will switch it on and let it get to work.
However, most modern rice cookers have more options, which we need to explain. Look at your rice cooker and see if it has options for different types of rice. Cooking rice depends on the type, and some rice cookers allow you to choose between white rice, brown rice, or other options.
Please switch it on and select the correct rice cooking time option. This will mean you won’t end up with dry rice, and the rice texture you can achieve will be perfect for your needs.
Step 7: Sit Back and Wait
The only thing you need to do is wait for the rice cooker to work its magic. This will vary depending on the rice you are cooking, but at least you know that you will have the perfect rice.
It would help if you remembered, though- it does take longer to warm up in a rice cooker. While a rice cooker works by boiling up the water, the heating element takes longer than it would on your stove. You need to have some patience, but it will be worth it. If you are patient and wait for the rice to cook, you will be rewarded with perfect rice.
Step 8: Keeping Cooked Rice Warm
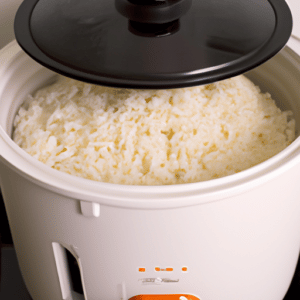
This is where rice cookers come into their own as they won’t only cook rice, but they will also keep it warm for you.
The rice cooker automatically turns to the warming mechanism when it realises that the rice is perfectly cooked. Some will do it without alerting you, while others will make a sound to let you know that they have switched over to this part.
They can keep rice warm for an extended period, and it won’t lead to rice becoming overcooked as a result.
Step 9: Checking the Rice
The final step here is to check the rice. Some people say that the best rice will have been left in the cooker for around 10 minutes before serving.
Take the plastic rice paddle, and scoop up some of that rice. It should have individual grains and look just as it does when you get it from a restaurant.
And that is how to use a rice cooker. It is straightforward, and at least you can then relax safe in the knowledge you will have that lovely fluffy rice every single time.
Getting It Right
Here are a couple of tips to help you along the way. With these tips, you’ll be able to cook perfect rice consistently.
Tip 1: Pay Attention to the Settings
If you plan on making firmer rice or rice for sushi, and it needs to be stickier, then pay attention to the settings when using a rice cooker. Follow the rice cooker instructions for the recipe, and adjust the rice cooking time accordingly.
Tip 2: Make Sure the Rice and Water Ratio
The rice and water ratio is at the absolute heart of making the ideal rice. Keep in mind that if you have three cups of rice, you need six cups of water. It should always be at that basic cooking ratio to get the best possible results. Some kinds of rice will require more water so check their cooking instructions.
Tip 3: Rinse the Rice Well
Rinsing the rice with cold water makes such a huge difference. This applies whether you are using long grain, short grain or anything else.
However, it’s generally accepted that rinsing rice is more important for fragrant rice, such as basmati or jasmine.
Cook Perfect Rice Every Time
If you cook rice regularly, investing in a rice cooker can save you time and stress. There’s nothing better than having perfectly cooked rice, and all you need to do is make sure that the rest of the meal comes up to the same standard.
Make use of the warm setting wherever possible. It removes some of the stress of trying to cook everything simultaneously, and rice cookers are specifically designed to help with that. In that respect alone, they are better than slow or pressure cookers, where you don’t have that option.