When it comes to knowing how to install a boiling water tap, you need to follow some relatively simple steps to complete the job.
While you do require some basic DIY skills, it is necessary to emphasise that installing boiling water taps is not as difficult as most people believe.
We’ll demonstrate how simple it can be through the guide below.
Why Install a Boiling Water Tap?
But why do you need to install a boiling water tap in the first place? Well, there are several reasons.
First, boiling water taps provide you with boiling water instantly. It means you will no longer have to wait for the kettle to boil if you need hot water for cooking. You simply turn on your boiling water tap, and it’s there straight away.
They are also very efficient and certainly better than constantly boiling that kettle. More and more people are looking at installing this type of water tap in their kitchen, and if you are interested in joining them, then this is what you need to do.
Be aware that this entire task is not as scary or complex as most people imagine. In saying that, we do recommend getting an expert in if you are at all concerned about any aspect. It’s not worth taking a risk just to save some money.
How it Works
How boiling water taps work is very basic. They use their boiler system for boiling water, and it works in pretty much the same way as a kettle. In this instance, the boiler will get the water up to a boiling point, and it does so instantly, so you don’t have to wait when you turn on the water tap.
The system is very basic, but that is part of its beauty. Boiling water taps will quickly become one of your go-to things in the kitchen, and we reckon you will wonder how you survived without it.
But all of this does mean it needs to be installed correctly, so the water supply comes through the boiler unit and then heats up the water. However, that is what we are going to look at now.
Installing Boiling Water Taps in 8 Steps
Step 1: Turn Off the Water Supply
The first step must always be to turn off the water. Get your stopcock and turn it completely. Then, check your water tap and drain any cold water sitting in the pipes. You need this to be empty before you start disconnecting anything.
Also, double-check the tap. You want this to be empty as well before you begin.
Step 2: Locate a Space for the Boiler
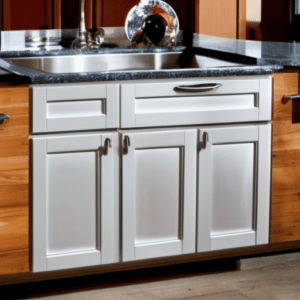
The next step is to be able to locate a space for the boiler that comes with the boiling water tap. This water tank will sit in a small space below the sink, and don’t worry, as it takes up less space than you expect.
This is the key if you want to make boiling water taps work. The fundamental point here is that it must be within easy reach of the cold water supply and also the feeds to the tap. You will also have to install a new boiling water tap at the top, but that will also be easy to do.
When finding a space for your boiling water tap installation, make sure the cold water feeds are not being stretched. That can cause problems with the pipes down the line, so make sure they are relatively loose.
Oh, and don’t forget another important point: it needs to be close to a safe plug socket. The boiler tank needs electricity for it to work, so make sure you can reach a power socket without too much difficulty. It will make your life easier in the future.
Step 3: Disconnect Your Old Kitchen Mixer Tap
It’s important that you go ahead and disconnect your old kitchen tap. You will be replacing it with a new version, so remove the old one at this point. To do so, remove the grub screw to take the head off the old kitchen tap. You can then remove the cartridges, unscrew the tap and remove it from the top of the kitchen sink.
After that, disconnect the water supply from the base of the tap, and the entire thing should come off without any problem.
Step 4: Working on the New Tap
It’s time for you to get to work on installing the new tap. Now, this is not a regular tap as it does have an additional feature that focuses on delivering that boiling water when required.
The first thing you need to do is to make sure you pass the feeds through for both the cold filtered water and the hot water. After this, you need to look at the instructions for whichever boiling hot water tap you have purchased, as they should inform you about how to attach the tap to your new sink correctly.
The odds are that most water taps require limited work to install. Attaching boiling taps to your actual sink is the same as a normal cold tap or hot tap. In that respect, there’s nothing different with these water taps.
Step 5: Attaching the Boiler Tank
This is the key step as you are going to attach the boiler tank: be careful, as there are a couple of things you need to do right here.
Exactly how you do, it will depend on the manufacturer. You need to make sure you have cold water coming into the boiler, and it is then able to go out the other end of the tank to deliver boiling hot water whenever you engage your instant hot water tap.
That means there are only a couple of connections to worry about, and the best boiling water tap will not complicate matters for you at any point. These instant hot water taps can then be plugged into that power socket.
Step 6: Checking Water Pressure
Checking your water pressure before you go to the next step is essential. You need to know your water pressure and how it correlates to the model you are using. If the natural pressure is too high, then you need to fit a special valve that will reduce the pressure.
This is important, or else the entire boiling tap system is going to be unable to function correctly.
Step 7: Priming the Boiler Tank
Before you go ahead and switch anything on, it is usually best that you set about priming these water taps.
This is going to involve you checking the entire boiling tap system for any potential leaks. It’s best to find them at this point before you go ahead and turn those water taps on full blast.
Now, exactly how you prime things will depend on the models of instant boiling water taps, you have installed. However, each boiling water tap will generally follow the same basic rules.
So, before you switch it on by plugging it into the mains, this is what you need to do.
Turn the Water Supply On
First, turn the water supply back on. You need to get water to move through the entire boiling water tap system, as it also allows you to check for any leaks.
Turn On the Instant Boiling Water Tap
Next, turn on the boiling water tap to allow the boiler to fill with water. Be aware that this process of getting everything flowing, and the boiler tank filling, can take over a minute. So, be patient.
Wait for the Water to Flow
You must wait and allow the water to flow from the tap. This only happens once the system has been filled. Use this as your opportunity to go ahead and check for any leaks in the system. Pay close attention, as those leaks from your boiling water tap system, can be small.
Step 8: Turning Everything On
After checking that everything is indeed watertight, it’s time to turn on the boiling water tap by plugging the system into your main power supply. Boiling hot water taps will be unable to function without this, but you can only power it up at the very last moment.
Once you have done this, the only thing you need to then do is to follow the set instructions for your particular boiling water tap. Each option may have a slightly different way of firing up their water tap, but they will provide accurate manufacturer instructions.
Extra Tips for Installing Boiling Water Taps
As you can see, installing boiling water taps is not too difficult. It’s quite straightforward if you follow only a few key steps. However, here are a few extra tips that should make installing your water tap a whole lot easier.
Tip 1: Be Aware of Space
While the idea of having a boiling water tap may appeal, you need to know you have the space available for the hot water tap in the first place. The important part is the boiler aspect, and it needs to go below your kitchen sink.
Measure the space available first, and be aware of how it cuts down on some storage space as a result. Do you need to make any adjustments to the space? How big a boiler system can it accommodate?
Being aware of the space before buying your boiling water tap system could prevent you from making a costly mistake.
Tip 2: Know How it Will Be Powered
As we have said already, boiling water taps need electricity to work. So, you must be aware of how your hot water tap will be plugged into the mains.
If you have no experience with electricity, then this is something that should be done by a professional. There is no reason why you should be taking any chances here. It’s just not worth the risk.
Tip 3: Factor in Your Filter
Don’t forget that you can still use a water filter, even with a boiling water tap. A filter is incorporated into a different part of the system, so the water will pass through the filter before it enters your hot water tap.
However, the problem here is going to be space. The good thing is you already know where your filter is located, so you can incorporate this into your measurements. But at least you know the two things should not pose a problem for one another.
And that is how to install a boiling water tap, and you can see how there are just a few steps to follow to get that hot water tap up and running. However, f you are not sure about installing your instant boiling water tap, then do seek the advice and help of a plumber. They will be able to complete this job in no time.
Installing a Boiling Water Tap in Your Kitchen
Boiling water taps can be a wonderful addition to your kitchen. They are quick to install, highly functional, and can transform the way you prepare hot drinks or a plate of pasta in your kitchen.
With so many different options on the market, it will be easy to find the perfect boiling water tap for your situation. However, we suggest you think over our few additional tips to make life easier!