You love great-tasting coffee. Who doesn’t? But if you own a filter coffee machine, have you ever contemplated how much dirt and bacteria may have accumulated on it that you or your customers could potentially consume?
It’s time to take action and thoroughly clean your device with these precise instructions. Read on and learn how to clean a coffee machine in four easy steps.
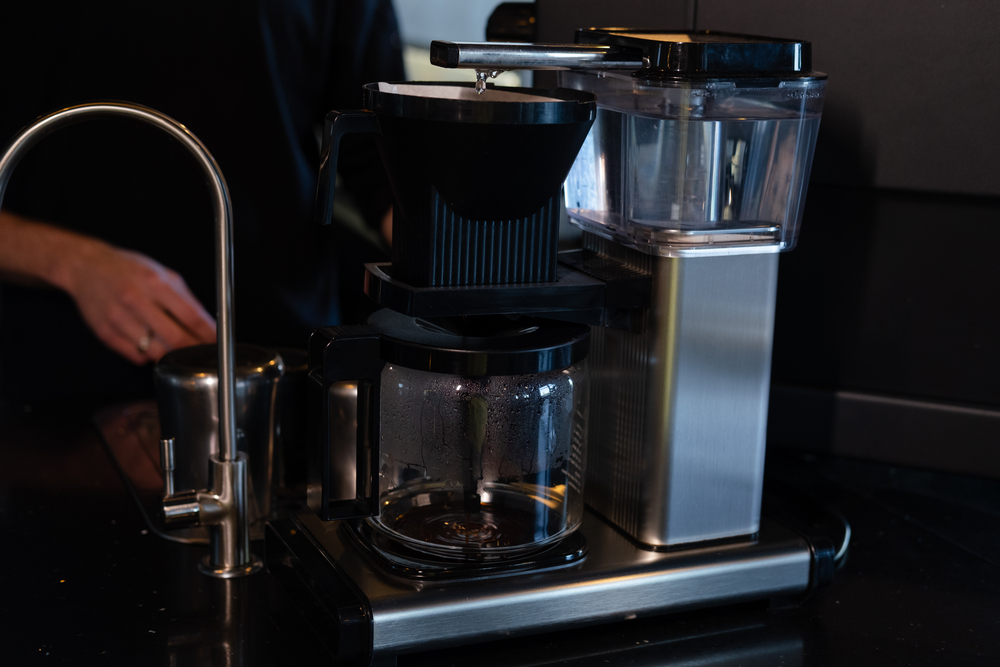
How to Clean a Filter Coffee Machine: Step-By-Step Instructions

You don’t need a lot of time or products to keep your coffee maker in its best condition. You probably already have everything in your cupboards at home.
What you need:
- Coffee maker
- Distilled white vinegar
- Coffee filters
- A clean, damp cloth
- Water
- Mild dishwashing liquid
Step 1: Fill the Coffee Maker With Distilled White Vinegar and Water
Begin cleaning your filter coffee machine with a vinegar and water solution (equal parts vinegar and water). However, if your coffee maker has a build-up of limescale and dirt, you can increase the amount of vinegar to sanitise any bacteria and dissolve any hard water deposits.
Step 2: Let the Mixture Soak
Once you’ve added this solution to your coffee maker, add a filter in the basket and switch on the maker. Power it off halfway through the cycle, letting the remaining vinegar soak inside the reservoir for up to one hour (depending on the severity of the dirt).
Step 3: Flush the Coffee Maker With Fresh Water
Then, switch on the coffee maker again and complete the brewing cycle. Remove the paper filter and the vinegar solution. At this point, you’ll notice a potent smell of vinegar, so you’ll need to fill the reservoir with plain water, add a filter to the basket and switch the coffee maker back on. Let it continue the brewing process, and then you can remove the filter and pour out the water. You may wish to repeat this flushing process with another cycle.
Step 4: Clean the Filters

For an effective clean, you also need to maintain your appliance’s filters. These can be either paper, mesh or metal filters. For paper filters, the great news is that you can easily dispose of them (checking whether they’re recyclable).
Alternatively, you can rinse a mesh or metal filter after every brew. Doing so will keep your filters clean and free from bacteria and coffee grinds. Don’t forget to clean the filter basket as well.
Step 5: Wash the Jug With Soapy Water
Moreover, another step of keeping your filter machine clean is to remove any bacteria build-up from the glass jug or carafe. Fortunately, most are made from tough glass, which stops them from breaking. They’re available in various finishes: smoked, transparent, tinted and more.
Before you start cleaning the jug or carafe, check the manufacturer’s instructions to ensure there aren’t any specific steps to avoid. For example, some jugs might not be dishwasher safe, so you’ll need to wash them by hand.
Lift the coffee pot away from the coffee maker, making sure that it’s far away from any electrical appliances. Then add soapy water to a bowl, and wipe the jug down inside with the clean water and a soft cloth. If there’s old coffee in the jug, you might need to use a textured cloth to help you remove any build-up. Then, rinse the jug with clean water to remove any dish soap.
Step 6: Clean the Drip Tray
Some coffee machines’ drip tray includes a line that shows you when it’s full of water or coffee and needs emptying. This can be useful for maintenance to ensure that your tray doesn’t become too full.
Firstly, pour away any built-up liquid and rinse the trap with warm tap water to ensure that there’s no leftover coffee inside. Then, remove the filter trap and add detergent to the tray, wiping the area down with a soft cloth. Make sure to reach into the corners where bacteria can easily form.
Step 7: Care for the Exterior Too
Finally, you should also pay attention to your coffee machine’s exterior, as this says a lot about hygiene and cleanliness. Remove the coffee pot and wash around this using a damp cloth with soapy water (there’s no need to purchase a pre-made cleaning solution). Then, give the coffee machine’s front, back, and sides a good wipe. If several people have access to the appliance, you might also want to use an antibacterial wipe on the buttons and screen (if applicable).
The Benefits of Cleaning With Vinegar
We recommend using vinegar during the cleaning process for a sparkling, clean machine. Vinegar is a non-toxic cleaning agent that absorbs odours, acts as a mild disinfectant and is safe to use around pets and children.
It’s also multipurpose, making it suitable to use on the exterior of your coffee machine, as well as the limescale filter and water filter to remove any nasty stuff that might have been lingering for a while. Best of all, you probably already have vinegar in your kitchen, or if not, it’s cheap enough to buy.
Why You Need to Clean Coffee Makers
Feel like cleaning a filter coffee maker is a waste of time? Here are just some reasons why keeping your coffee maker clean is important.
General Cleanliness
Nobody likes a build-up of dirt. Poor hygiene not only looks messy and unattractive, but it’s also integral to your health to keep regularly used appliances clean and tidy to prevent a build-up of bacteria that you or customers could then eventually drink.
How you maintain and care for your appliance also says a lot about how you maintain your home. Keeping it presentable and in tip-top condition sends out a positive message to family members and guests.
Enhance the Taste of Coffee

Coffee won’t taste as delicious if it’s served in a dirty cup, and that also applies if you prepare beverages in an unclean coffee maker. Often, a bitter-tasting coffee is down to a dirty diffuser.
If left unwashed, these diffusers can create a metallic or sour aftertaste. So regularly cleaning your coffee maker can prevent grime and dirt from sitting on your machine, thus affecting the taste of your coffee.
Improve the Coffee Machine’s Longevity
Moreover, regular maintenance can increase your coffee machine’s lifespan. When left unclean and uncared for, coffee machines require replacing. But a well-kept coffee maker lasts much longer, and you’ll have a lower chance of parts needing replacing.
Signs Your Coffee Maker Needs Cleaning
Not sure how to recognise if your coffee maker is due for a cleaning? Here are some obvious signs that it’s time to whip out the vinegar and clean water mixture. Firstly, oil and mineral build-up will force on your coffee maker, creating stains and producing bitter-tasting coffee.
On the other hand, germs and bacteria can often have a silent presence, so it’s best to get into a good habit of regularly washing down your coffee machine after every use. Unclean coffee makers contain yeast and mould, which can continue allergic reactions and infections. So, essentially, your coffee maker could be making you sick or weakening your immune system.
You might also notice that your coffee machine takes longer than it used to when brewing a coffee pot, all the while making loud noises. In fact, some unclean coffee machines can make loud noises without even brewing in the end. Finally, another obvious factor you need to clean a coffee machine is if the appliance spews coffee everywhere while making a beverage.
How Often to Clean Your Coffee Maker
Now that you know the steps involved in effectively cleaning a coffee maker, how often should you spruce it up? If you use the appliance daily, we recommend thoroughly cleaning it around once a month. Coffee grounds can stick to the brew basket, while water droplets and bacteria can accumulate in various parts.
Aside from using this timescale as a guideline, we also recommend inspecting your appliance for spots of mould as well as looking out for any signs we mentioned above. If you notice that your appliance is in need of a cleaning, don’t wait until bacteria has built up to get out the cleaning solution; take action now.
How to Descale a Filter Coffee Machine
Aside from thoroughly cleaning your coffee machine, it’s also your duty to regularly descale it to prevent limescale from forming on the surface. Here are some easy-to-follow instructions on descaling your coffee machine:
- Switch off the coffee machine and remove any electrical outlets
- Empty any remains from the decanter
- Remove any leftover coffee grains
- Rinse the decanter with warm water
- Fill the water reservoir with white vinegar and clean water to the maximum level
- Turn on the coffee machine and select the descaling function, allowing the cycle to run all the way to the end
You should follow these steps around once a month, depending on how often you use the machine. If you use your coffee maker regularly, perform descaling every few days. You may also want to take into consideration that you live in a hard water area where you’ll need to descale or use descaling tablets more frequently.
Keeping Your Coffee Machine Clean
We hope you found this guide on how to clean a filter coffee machine helpful. After all, keeping your coffee maker clean and hygienic will enhance the overall taste of your coffee.
Maintaining your coffee machine need not be expensive. By using vinegar on all removable parts, you can kill bacteria and easily remove build-up on the interior and exterior to keep your appliance looking new.
If you have questions about maintaining coffee machines, let us know in the comments section below. For more kitchen tips, check out our other beginners’ guides.